
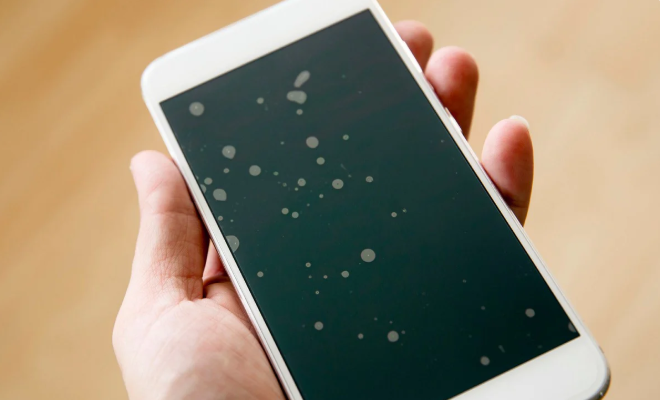
Installing a tempered glass screen protector may seem like a simple task, but many people end up frustrated by trapped air bubbles, dust particles, and alignment issues. Even a high-quality screen protector can look poorly installed if the application process is rushed or performed in the wrong environment.
The good news is that most installation problems are completely avoidable. More importantly, the most common issue-air pockets trapped beneath the glass-can often be fixed in seconds without removing and replacing the protector. With the right preparation and technique, you can achieve a smooth, professional-looking installation that provides reliable protection for your device.
Why Air Bubbles Appear Under Screen Protectors
Air bubbles form when pockets of air become trapped between the phone screen and the adhesive layer of the tempered glass. While some small bubbles disappear naturally over time, larger bubbles often require manual correction.
Several factors can contribute to bubble formation. Dust particles are one of the most common causes because they prevent the adhesive from making full contact with the display. Fingerprints, oil residue, and improper alignment can also create gaps that trap air beneath the glass. In some cases, repeatedly lifting and repositioning the protector introduces additional air and debris, making the problem worse.
Understanding these causes is the first step toward preventing installation issues and achieving a clean finish.
Preparing for a Bubble-Free Installation
Proper preparation plays a major role in the success of your installation. Spending a few extra minutes preparing the screen and workspace can save significant time and frustration later.
Choose a Clean Workspace
Select a well-lit area with minimal airflow. Dust and lint floating in the air can easily settle on the screen during installation. Good lighting helps you identify particles that may otherwise go unnoticed.
Many people prefer installing screen protectors immediately after cleaning their workspace because there is less chance of airborne dust interfering with the process.
Clean the Screen Thoroughly
Before installing the protector, turn off your device and clean the display using an alcohol wipe. This removes fingerprints, oils, and other contaminants that may affect adhesion.
Afterward, use a microfiber cloth to polish the screen until it is completely clear. Carefully inspect the display from different angles to ensure no smudges remain.
Remove Remaining Dust Particles
Even after cleaning, tiny dust particles may still be present. Use dust-removal stickers or adhesive tabs to lift any remaining debris from the screen surface.
This step is extremely important because even a single dust particle can create a noticeable bubble under the glass.
How to Apply a Tempered Glass Screen Protector Correctly
A careful installation process greatly reduces the chances of trapped air and misalignment.
Test the Alignment First
Before removing the protective backing, place the screen protector over the device to check its position. Familiarize yourself with the alignment of camera cutouts, speakers, and screen edges.
If your screen protector includes an alignment frame, install and use it according to the manufacturer's instructions.
Lower the Protector Slowly
Remove the adhesive backing and slowly lower the protector onto the display. Start from one edge and allow the adhesive layer to spread naturally across the screen.
Avoid pressing aggressively on the glass. Modern tempered glass protectors are designed to self-adhere as they settle onto the display.
Inspect the Installation
Once the protector is in place, check all sides to ensure proper alignment and adhesion. Small bubbles may appear initially, but many can be corrected easily if addressed right away.
The Simplest Way to Remove Trapped Air Bubbles
The most common mistake people make when they see an air bubble is pressing repeatedly on the center of the bubble. This often pushes the air around without actually removing it.
A much more effective solution is to create a path for the trapped air to escape.
Use the Edge-Lifting Method
If you notice an air bubble, use your fingernail to gently lift the edge or corner of the screen protector closest to the bubble. Continue lifting slowly until the trapped air pocket connects with the open edge of the protector.
Once the bubble has a clear route to escape, gently push the trapped air toward the lifted edge while carefully laying the protector back down. Working slowly allows the air to leave completely instead of becoming trapped elsewhere beneath the glass.
This simple technique is often the quickest and most effective way to eliminate air pockets and achieve a flawless finish without starting the installation over.
When Dust Is Causing the Bubble
If the bubble does not disappear after using the edge-lifting method, a dust particle may be trapped beneath the protector.
In this situation, carefully lift the nearest corner, remove the dust using a dust-removal sticker, and then reapply the protector. Once the particle is removed, the adhesive can make proper contact with the screen.
Common Installation Mistakes to Avoid
Many screen protector issues can be traced back to a few common mistakes.
Rushing the Process
Trying to complete the installation too quickly often leads to poor alignment and trapped bubbles. Taking your time usually produces much better results.
Touching the Adhesive Surface
The adhesive layer should never be touched directly. Oils from your fingers can affect adhesion and create visible imperfections beneath the glass.
Repeated Repositioning
While minor adjustments are sometimes necessary, repeatedly lifting and repositioning the protector increases the risk of introducing dust and air pockets.
Ignoring Small Dust Particles
Many users underestimate how much impact a tiny dust particle can have. Always inspect the display carefully before placing the protector on the screen.
Tips for Long-Term Performance
Once your screen protector is installed, proper care can help maintain its appearance and effectiveness.
Clean the surface regularly using a microfiber cloth to remove fingerprints and smudges. Avoid harsh cleaning chemicals that may damage protective coatings. It is also a good idea to avoid picking at the edges of the protector, as repeated pressure can weaken adhesion over time.
A properly installed and maintained tempered glass screen protector can provide long-lasting protection against scratches, minor impacts, and everyday wear.
Final Thoughts
Installing a tempered glass screen protector without bubbles is largely a matter of preparation, patience, and proper technique. Cleaning the screen thoroughly, removing dust particles, and aligning the protector carefully can prevent most installation problems before they occur.
If an air bubble does appear, there is usually no need to start over. Simply lift the edge or corner closest to the bubble, connect the air pocket to the open edge, and slowly push the trapped air out while laying the protector back down. This straightforward method can quickly restore a smooth, professional-looking finish.
By following these best practices, you can enjoy a clean installation, better screen protection, and a more polished appearance for your device.
Frequently Asked Questions
1. How do I remove an air bubble trapped under a screen protector?
Use your fingernail to gently lift the edge or corner closest to the bubble. Slowly lift until the air pocket connects with the open edge, then push the air toward the opening while carefully laying the protector back down.
2. Can screen protector bubbles disappear on their own?
Small air bubbles often disappear within 24 to 48 hours as the adhesive settles. However, bubbles caused by dust or debris usually require manual correction.
3. What causes bubbles under a tempered glass screen protector?
The most common causes include trapped air, dust particles, fingerprints, oil residue, and improper installation techniques. A clean screen and careful application can help prevent these issues.
4. Should I remove and reinstall my screen protector if I see bubbles?
Not necessarily. Many bubbles can be removed using the edge-lifting method. Reinstalling the protector should only be considered if dust or debris is trapped underneath.
5. What is the best way to clean a phone screen before installation?
Use an alcohol wipe to remove oils and fingerprints, then polish the screen with a microfiber cloth. Finish by using a dust-removal sticker to lift any remaining particles.
6. Can I reuse a tempered glass screen protector?
Most tempered glass screen protectors are designed for a single installation. Repeated removal and reapplication can weaken the adhesive and increase the risk of dust contamination and bubbles.


Share:
UltraVision AR Pro™ vs Standard Tempered Glass: Which Screen Protector Is Better for iPhone 17 & iPhone 16?
Why Does My Screen Protector Keep Lifting at the Edges?